Support
Accounts Payable
- AP Overview
- Purchase Orders
- How to Create Purchase Orders
Brewery Inventory Management
- Activating the Brewery Inventory Module
- Creating Products and Recipes
- Importing BeerXML Recipes
- Quick Start Guide
- Inventory
- Adding Items to Your Inventory
- Batches
- Brewing A Batch
- Creating a Quick Batch
- Packaging
- Defining Packaging Groups
- Packaging Up A Batch
- Setting Up a Packaging Group (Can Flat)
- Setting Up A Packaging Group (Kegs)
- Advanced Options
- SKU Multiplier
Digital Menus
Employee Management
Integrations
Log Book
Scheduling
Settings
Team Messaging
Training
Learn how to get started with BarSight, and publish your first schedule to your employees with our restaurant employee scheduling software.
First Up, The Toolbar

Across the top of your screen will be a row of buttons and dropdowns such as:
-
Department - Switch between the different departments in your restaurant such as Back of House, Front of House, or even display all of them at once. Only the roles and employees that are part of the selected department will be displayed on the scheduler.
-
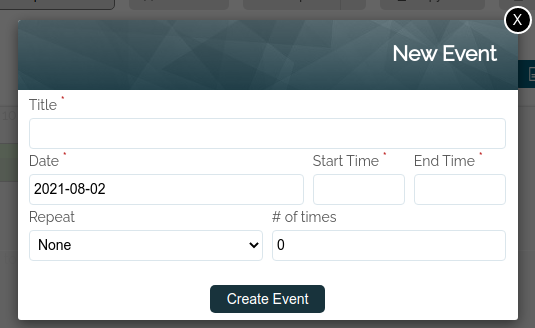
New Event - Create a new event that will be displayed on all your staffs calendar (visible on both web and through our app). Set a title, date, start and end times. If this is a repeating event you can even choose to repeat this event daily, weekly, monthly, or yearly and certain number of times.
-
Templates - Save, Load, or Delete scheduling templates that you've created in BarSight. Once you get your schedule tweaked just right, save it as a template and you'll be able to recall/load it into any week in the future.
-
Copy Week - Copy the currently viewed week, into next week or the week after. This is more used on an ongoing basis, whereas using templates lest your vastly change the schedule week to week.
-
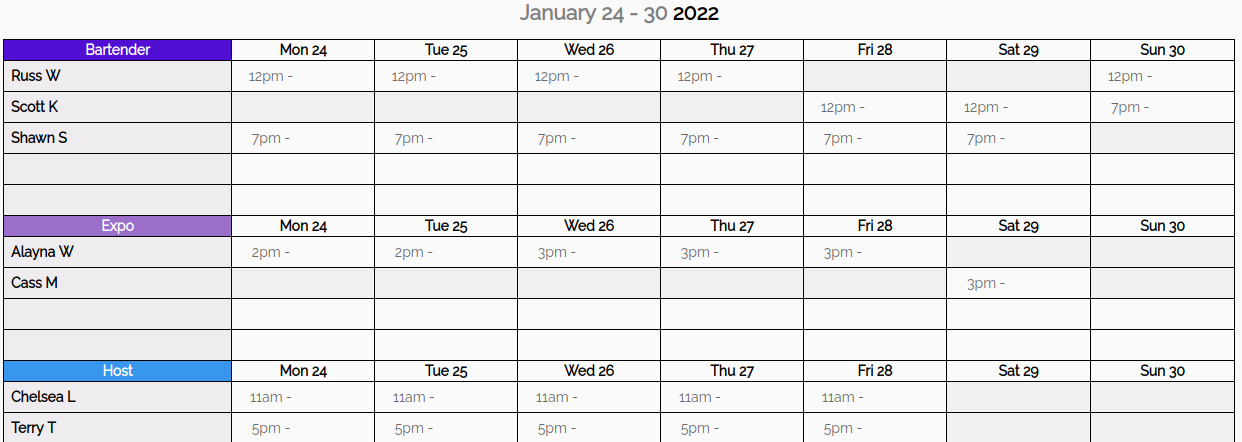
Print Schedule / Print Sign-out Sheet - What good would a scheduling software be without printing a schedule? So obviously we have this feature here, you can print a draft version to have a look at the schedule as you build it. Once your done, publish the shifts, and print out the final published roster to pin up at the back of your restaurant if you wish. Printing out the weekly sign-out sheet can help you keep a paper trail of the actual hours worked by your employees.
-
Publish Shifts - You'll need to publish your schedule to all your employees before they can see it and it becomes official. As you are working on the schedule, all the unpublished shift blocks will have a yellow triangle beside them. Indicating that this this is unpublished, and not visible to the employee yet.

Scheduling Day by Day
Unlike traditional employee availability based scheduling, we approach scheduling a bit differently. With BarSight, you'll build your schedules with your business needs first, and fill in the gaps based on your employees availability. Think about how you want your restaurant to operate...
-
Your opening server comes in at 8 am to get everything unlocked and prepped from the night before
-
Your daytime bartender starts at 10am to get things rolling in the bar
-
Soon you'll be adding a host and another server, or a shift lead that will see you through your lunch rush
-
...and so on
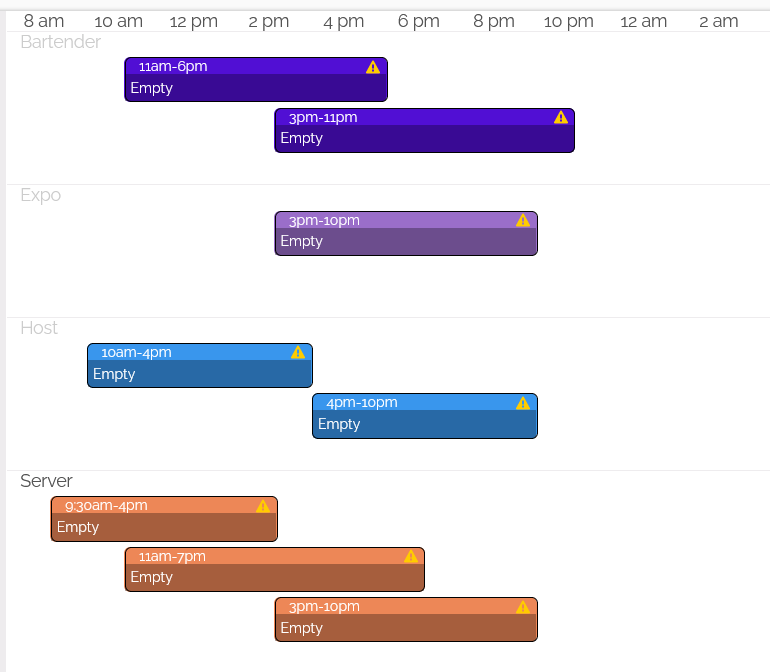
Once you've got your skeleton schedule built, you can then start filling it with your employees.
Don't fret if you have no staff available to be assigned to a certain shift, you can always leave it empty, publish the schedule, and update the shift when you found somebody to cover
A Closer Look
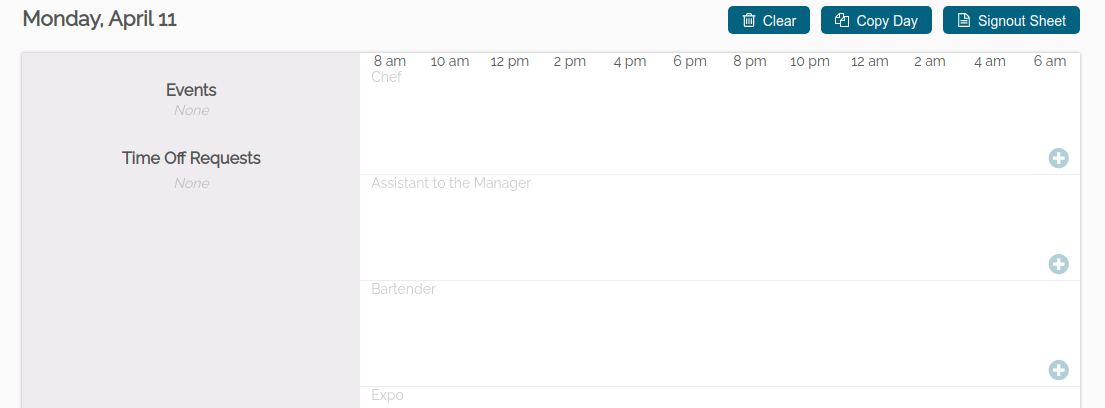
With the general theory of scheduling your employees with BarSight, lets get familiar with the screen you'll most likely be starting with. Obviously, in the top left is the current day we are editing, followed by a mini-toolbar.
-
Clear - Remove all employee shifts from this day.
-
Copy Day - Like what you see? Copy everything over to the next day, easy peasy.
-
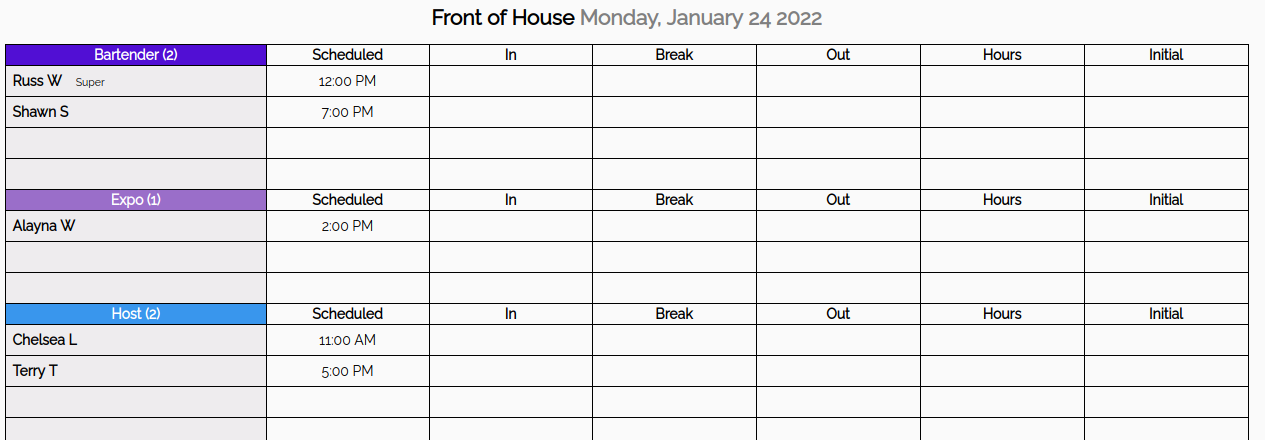
Sign-out Sheet - Print a daily sign-out sheet similar to the weekly sign-out we showed you earlier.
Below that we have Events, and Time off requests. Pretty self-explanatory really, all your events and approved time off requests will be shown here for easy reference.
Now, getting into the meat and potatoes of our employee scheduling software. The big white space in front of you may be daunting, but its quite simple. From left to right is the time of day, and from the top to the bottom is rows of the roles currently being shown (use the Department Dropdown we mentioned earlier to change what roles are shown).
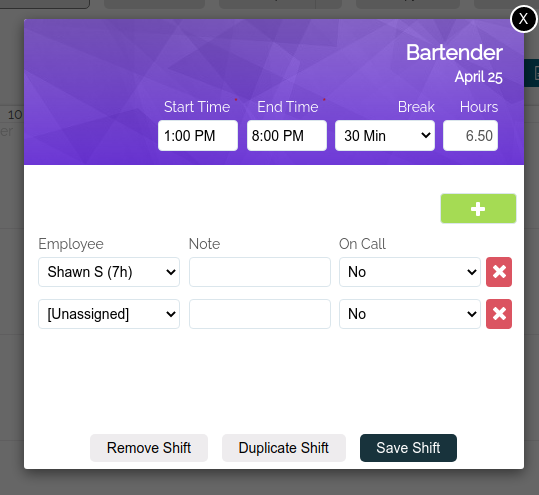
To create a new shift may be referred to as a Shift Block), hover your mouse over the desired role - such as Bartender, and click! A new window will open up with the start time, end time, break, and ability to assign this shift to a number of employees.
Assigning Tasks or Special Instructions
You can use this screen to add notes to your employees shift slots. Add a task such as 'Clean Bar Fridges' to remind that employee of an additional task for the day. Or assign sections to your servers ahead of time so there's no squabbling for the best zone. These notes will be seen everywhere by the employee, on their calendar, on the app, and on the printed schedule.
Shift Block? Shift Slots? Say What?
Quite simply, a shift block is the definition of a role, on a day, at a particular time. A shift block can contain one or more shift slots, which are assigned to employees. Want 2 line cooks to start at the same time, create a shift block and add 2 rows, choose the employees to be assigned. Simple as that. It's all the same at the end of the day, just a nicer way to organize your restaurant schedule with grouping the shifts.
Labor Costs and Sales Forecasting
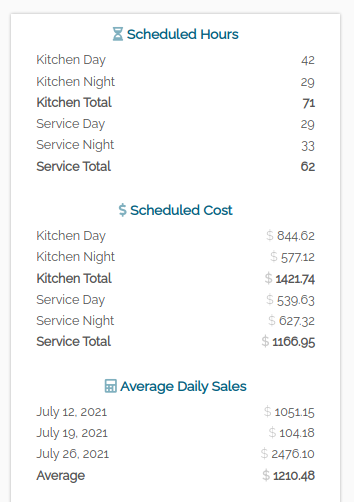
As you build your schedule, BarSight will total up the hours and estimated cost of the schedule on the right side of your screen. You'll be able to see in real time how much the schedule predicted to cost. If you've activated any POS Integrations, such as Square, we can also show your average daily sales and forecast that with your estimated labor costs, to give you an operating margin.
Publish Your Weekly Schedule
The final step, once you've made any last minute tweaks and the schedule looks good - is to publish your schedule.
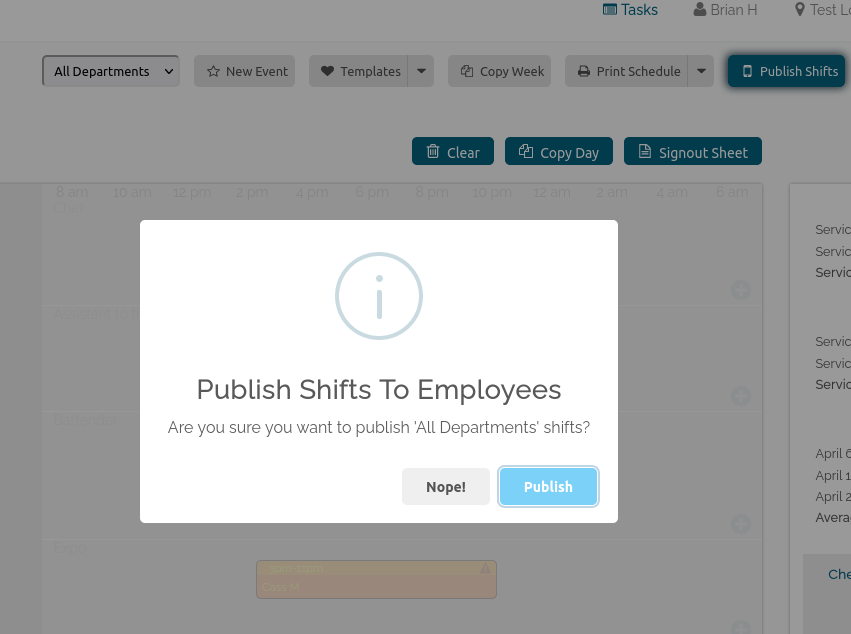
Up at the toolbar, click the button Publish Shifts, and you'll get a dialog box popup that just wants to confirm your ready to publish the shifts to your employees. Depending on the department you're viewing, you can publish them separately or all together. This allows your Chef or Sous Chef to publish the BOH schedule if they are ready before the FOH schedule is ready (admit it, that's usually the case!).
Once the schedule is published, your employees will be able to see their schedule for that week on their phones/laptops. If they have the free mobile app downloaded, they'll also get a notification alert.
Making Scheduling Changes After Publishing
We know nothing is ever permanent - especially the schedule for your restaurant. After you publish the schedule you can always make changes, such as adjusting start and end times or changing the employee. After you've made changes you'll see a yellow triangle in the corner of the shift block and if you hover over the block, a message will let you know the shift is unpublished.
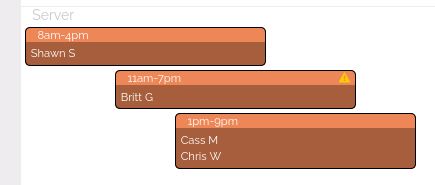
In the above example, everyone else will be able to see their shifts except for Britt. In order for her to see the changes, you'll need to click the Publish Shifts button again.


