Support
Accounts Payable
- AP Overview
- Purchase Orders
- How to Create Purchase Orders
Brewery Inventory Management
- Activating the Brewery Inventory Module
- Creating Products and Recipes
- Importing BeerXML Recipes
- Quick Start Guide
- Inventory
- Adding Items to Your Inventory
- Batches
- Brewing A Batch
- Creating a Quick Batch
- Packaging
- Defining Packaging Groups
- Packaging Up A Batch
- Setting Up a Packaging Group (Can Flat)
- Setting Up A Packaging Group (Kegs)
- Advanced Options
- SKU Multiplier
Digital Menus
Employee Management
Integrations
Log Book
Scheduling
Settings
Team Messaging
Training
Define Your Packaging Groups
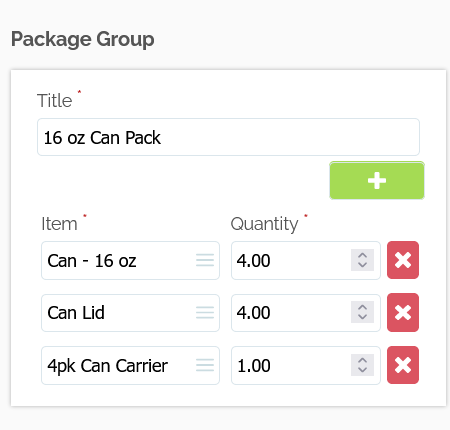
Before packaging up your beer, you need to set up packaging groups, typically you would be breaking this down into:
- Cans
- Can Lids
- Can Sleeves
- Pack Holder
Or if you were kegging, your packaging group might look like:
- Keg Shell
- Keg Cap
- Keg Collar
Here is an example of what we include by default, to give you an idea on how to manage your packaging groups.
Adding Packaging Groups to Your Batch
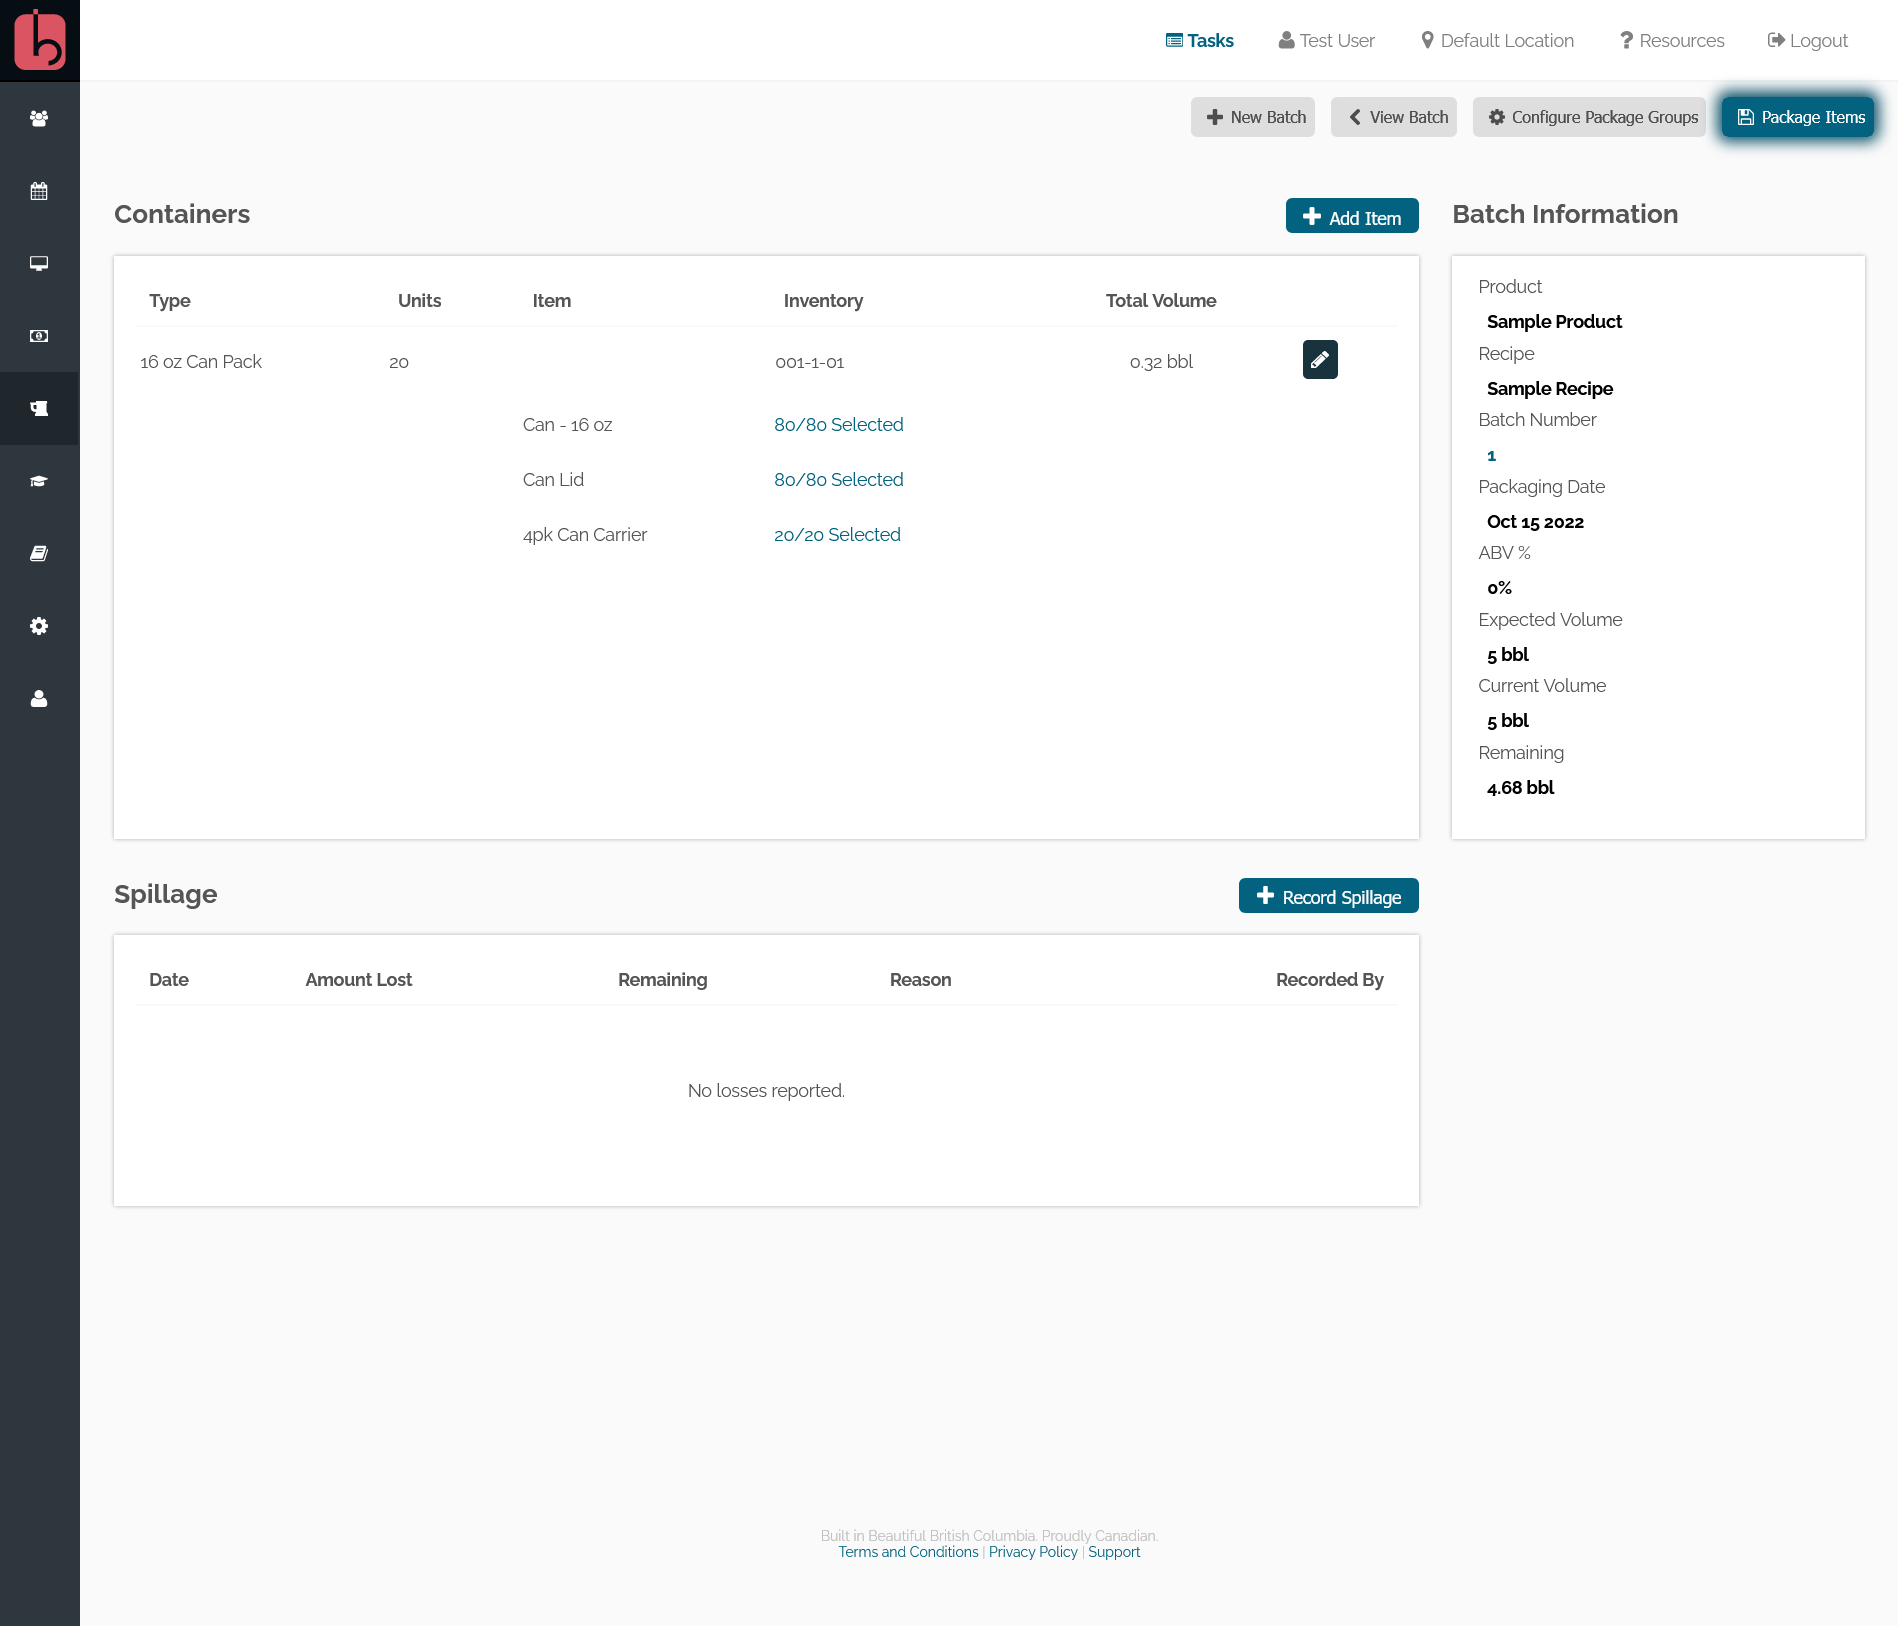
When your beer is ready to be packaged into cans or kegs, you can select the View Packaging button from within the batch summary screen, or by going to the menu and under Brewery -> Final Products you will see the beer in the tank ready to be packaged.
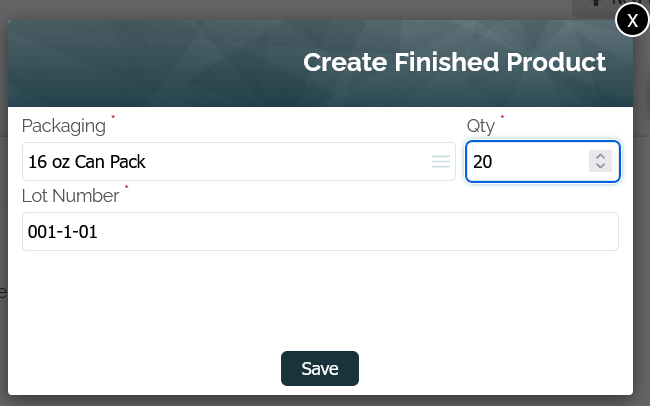
Click add items to choose a packaging group (as defined in the section above), the quantity, and the lot number that is to be assigned to this group. The system automatically generates a lot number that increases with each group added to the batch, but you are able to add your own if you use another method.
When you have selected all the items out of the inventory to be consumed by the packaging process, click the Package Items your inventory will be updated, and the beer will be ready to be sold.

